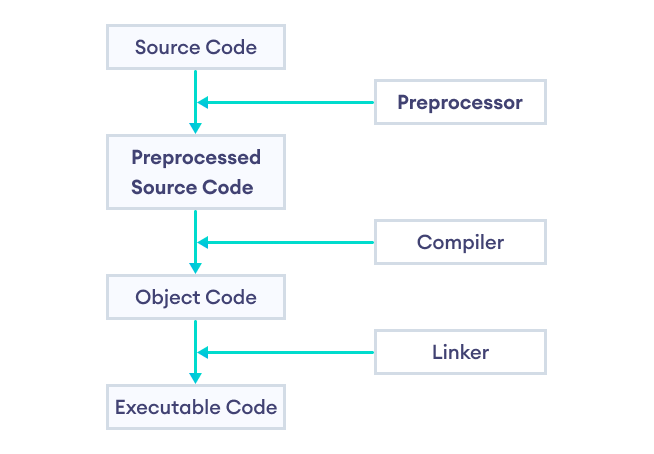
As the name suggests, C++ preprocessors are tools that transform (preprocess) our program before it is compiled.
Preprocessors use preprocessor directives in order to control the code transformation. For example,
#include <iostream>
Here, #include is a preprocessor directive that inserts the contents of the <iostream> header file into our program before compiling it.

Preprocessor Directives
In C++, all preprocessor directives begin with the # symbol. For example, #include, #define, #if, and so on.
Some of the common applications of C++ preprocessors are:
#include- to include header files#define- to define macros#if- to provide conditional compilation
Now, let's learn about each of these preprocessor directives in detail.
#include Preprocessor Directive
The #include directive is used to include header files in our program. For example,
#include <cmath>
Here, cmath is a header file. The #include directive tells the preprocessor to replace the above line of code with the contents of the cmath header file.
This is the reason we need to use #include <cmath> to use functions like pow() and sqrt().
We can also create our own custom header files and use them in our program using the #include directive. For example,
#include "path_to_file/my_header.h"
Here, we have included a custom header file named my_header.h in our program.
This way, we can divide a larger program into multiple files.
#define Preprocessor Directive
The #define directive is used to "define" preprocessor variables which can be used in our programs. For example,
#define PI 3.1415 // value of pi
Now, when we use PI in our program, it is replaced with 3.1415.
Here, PI is known as a macro. A macro is a fragment of code which has been given a name.
Example 1: C++ #define
#include <iostream>

// create a macro named PI
// with the value 3.1415
#define PI 3.1415

using namespace std;

int main() {

    double radius, area;

    cout << "Enter the radius: ";
    cin >> radius;

    // use PI to calculate area of a circle
    area = PI * radius * radius;
    cout << "Area = " << area;

    return 0;
}
Output
Enter the radius: 4
Area = 50.264
Function-like Macros
We can also use #define to create macros that work like a function. For example,
#define circleArea(r) (3.1415 * r * r)
Let's take a working example:
#include <iostream>
#define PI 3.1415

// macro that calculates area of circle
// and takes parameter 'r'
#define circle_area(r) (PI * r * r)

using namespace std;

int main() {

    double radius = 2.5;

    // call the circle_area() macro
    // pass radius as an argument
    cout << "Area = " << circle_area(radius);

    return 0;
}
Output
Area = 19.6344
Here, the code circleArea(radius); expands to 3.1415 * 2.5 * 2.5.
Note: It is better to use functions rather than function-like macros as macros are more error-prone.
#if Preprocessor Directive
The #if directive is used to instruct the preprocessor whether to include a block of code or not depending on certain conditions.
It can also be used in conjunction with the #else and #elif directives in case of multiple conditions.
Hence, the #if, #else, and #elif directives are quite similar to if...else statements in C++ with one major difference.
The if...else statements are tested during execution time to check if the block of code should be executed or not.
On the other hand, conditional directives are tested by the preprocessor before compilation to decide whether to include a block of code in the program or not.
Here's a simple example,
#include <iostream>

// create NUMBER macro with a value of 3
#define NUMBER 3

using namespace std;

int main() {

    // use #if directive to check
    // if NUMBER is greater than 0
    #if (NUMBER > 0)
        cout << NUMBER << " is greater than 0.";
    #else
        cout << NUMBER << " is less than 0.";
    #endif

    return 0;
}
Output
3 is greater than 0.
Here, the #endif directive is used to indicate the completion of the #if and #else directives.
However, if...else statements are preferred over preprocessor directives for deciding which part of the code to execute during runtime.
Nevertheless, there are a few situations where #if directives are more applicable:
- To use different code depending on the operating system (platform-specific code).
- To include debugging codes (like printing debugging messages) that are run only on debugging builds.
- To toggle features on and off depending on certain conditions.
- To include code that is specific to certain versions or releases of the software (version-specific code).
Example 2: Platform-Specific C++ Code
#include <iostream>
using namespace std;

int main() {

    // include if running on windows
    #ifdef _WIN32
        cout << "Hello from Windows!" << endl;

    // include if running on linux
    #elif __linux__
        cout << "Hello from Linux!" << endl;

    // include if running on some other system
    #else
        cout << "Hello from an unknown platform!" << endl;
    #endif

    return 0;
}
Output
Hello from Linux!
This is an example of platform-specific code using conditional compiling.
Here,
_WIN32- a macro defined by the Microsoft Visual C++ compiler on Windows platforms__linux__- a macro defined by GNU C Compiler on Linux systems#ifdef- a variant of#ifwhich checks if a macro has been defined or not
The macros _WIN32 and __linux__ are used to determine the system on which the program is running.
Predefined Macros
Here are some commonly used predefined macros in C++ programming.
| Macro | Value |
|---|---|
__DATE__ |
A string containing the current date. |
__FILE__ |
A string containing the file name of the currently executing program. |
__LINE__ |
An integer representing the current line number. |
__TIME__ |
A string containing the current time (GMT). |
Note: Since these are predefined macros, we do not need to use the #define directive to use them.
Example 3: Predefined Macros
#include <iostream>
using namespace std;

int main() {

  // print the current time
  cout << "Current time: " << __TIME__;

  return 0;
}
Output
Current time: 04:23:31
This program prints the current time (GMT) using the __TIME__ macro.